
Tron, a blockchain platform, has gained popularity in recent years due to its ability to offer fast and scalable transactions. As many blockchain enthusiasts are eager to be part of the Tron ecosystem, it is important to have a secure and convenient wallet to store and manage Tron tokens.
Tron Wallet Extensions are a great choice for users who want to access their Tron funds directly from their web browsers. With Tron Wallet Extensions, users can easily send and receive TRX and other TRC-based tokens, as well as interact with decentralized applications (DApps) built on the Tron network.
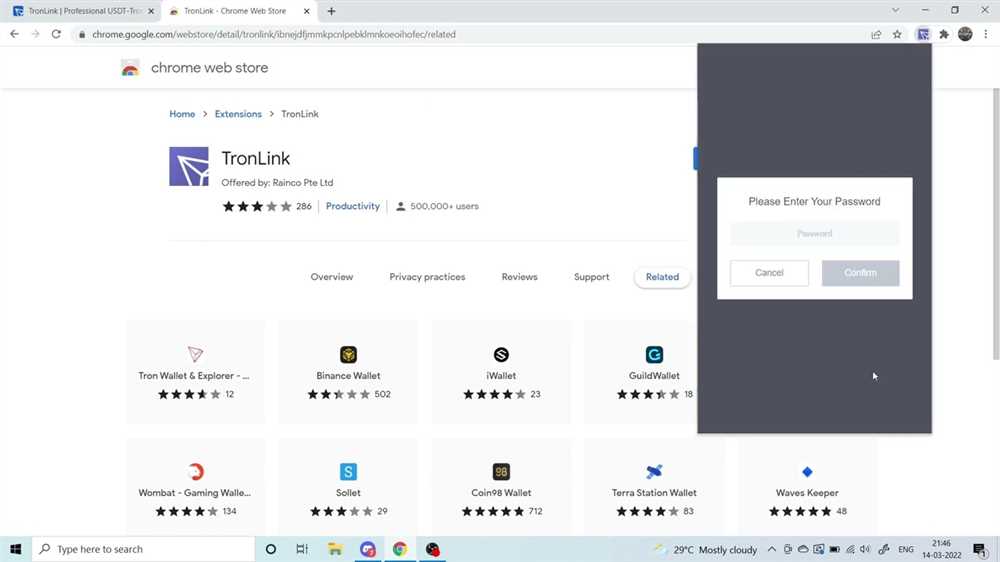
To get started, the first step is to install the Tron Wallet Extension on your preferred web browser. Currently, Tron Wallet Extensions are available for Chrome, Brave, and Firefox. Simply search for Tron Wallet Extension in the respective browser’s extension store and click on the “Add to Chrome” (or equivalent) button to install it.
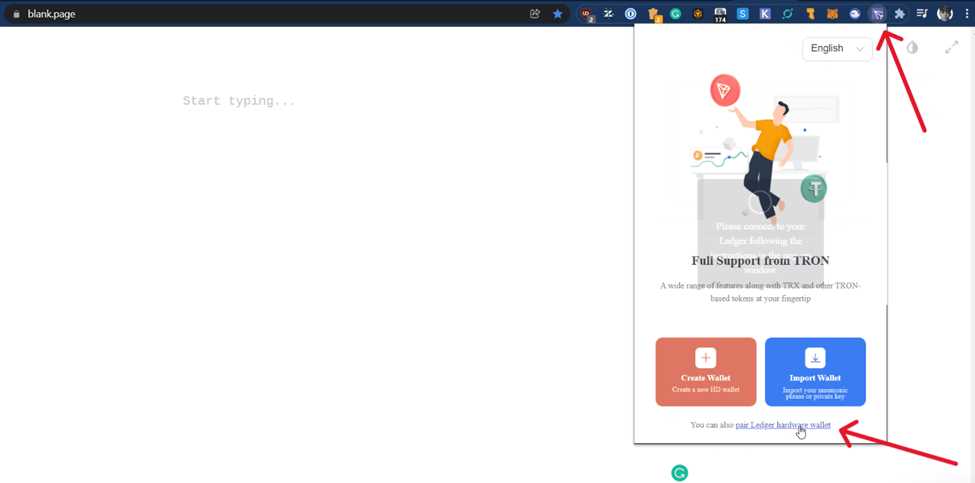
Once installed, the Tron Wallet Extension icon will appear in your browser’s toolbar. Click on the icon to open the wallet interface. At first launch, you will be prompted to create a new wallet or import an existing one. If you are new to Tron, select the “Create a New Wallet” option and follow the on-screen instructions to set up a strong password and securely back up your wallet’s recovery seed.
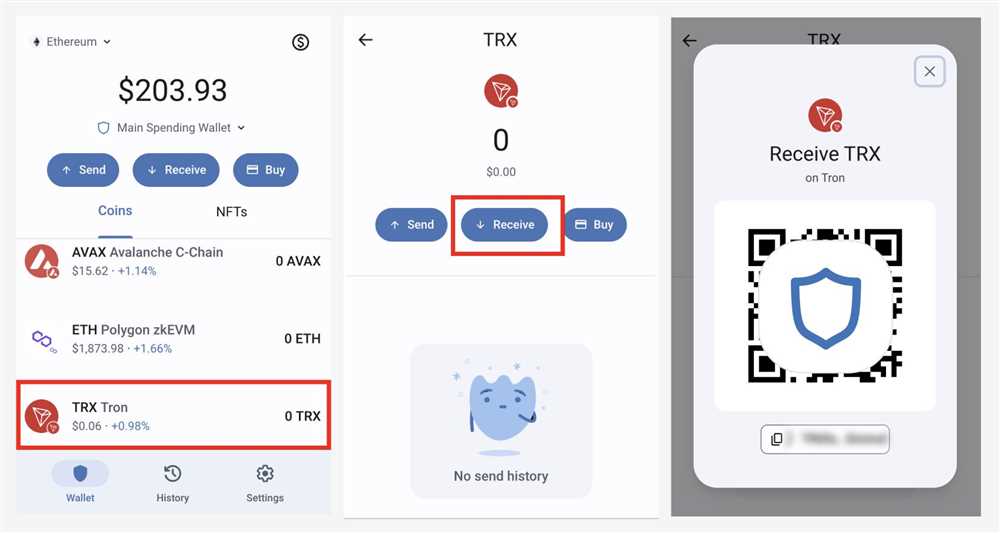
After setting up your wallet, you can start receiving TRX or other TRC-based tokens by copying your wallet address or scanning the provided QR code. To send tokens, simply enter the recipient’s address and the amount you wish to send. You can also interact with DApps by visiting Tron DApp platforms and confirming transactions directly from your Tron Wallet Extension.
In conclusion, Tron Wallet Extensions provide a user-friendly and secure way to access and manage your Tron funds. By following the simple steps outlined above, you can set up your Tron Wallet Extension and start enjoying the features and benefits of the Tron blockchain ecosystem.
What is Tron Wallet Extension?
Tron Wallet Extension is a browser extension that allows users to store, manage, and interact with TRON tokens and TRON blockchain-based dApps directly within their web browser. It provides a convenient and secure way to access the TRON network without the need for a separate wallet or application.
The extension provides users with a seamless experience by integrating with popular browsers like Chrome, Firefox, and Brave. It allows users to send and receive TRX and other TRON-based tokens, interact with smart contracts, and easily access decentralized applications (dApps).
Tron Wallet Extension also offers various security features to ensure the safety of users’ funds. It uses encryption and locally stored private keys to protect users’ wallets and transactions. The extension also supports hardware wallets, such as Trezor and Ledger, for added security.
Key Features of Tron Wallet Extension:
- Secure storage and management of TRON tokens
- Easy access to TRON blockchain-based dApps
- Ability to send and receive TRX and other TRON-based tokens
- Integration with popular web browsers
- Support for hardware wallets for enhanced security
How to Set Up Tron Wallet Extension?
- Download the Tron Wallet Extension from your preferred web browser’s extension store.
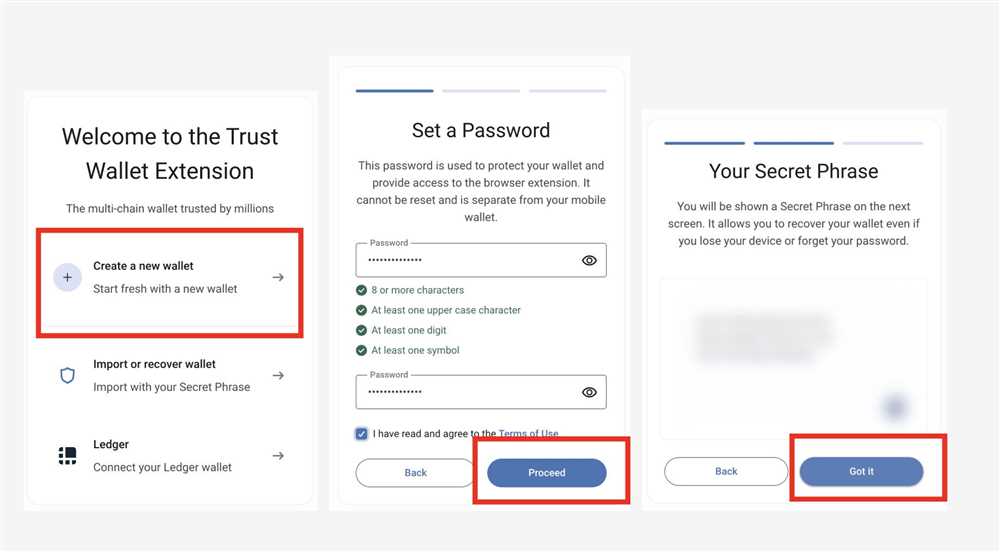
- Create a new wallet or import an existing one using your private key or mnemonic phrase.
- Set a strong password for your wallet to ensure its security.
- Backup your wallet by following the provided instructions.
- Start using the Tron Wallet Extension to manage your TRON tokens and interact with dApps.
Why Use Tron Wallet Extension?
The Tron Wallet Extension offers a secure and convenient way to manage your TRX and other TRC10 and TRC20 tokens. Here are some of the key reasons to use the Tron Wallet Extension:
- Security: The Tron Wallet Extension utilizes industry-leading encryption and security measures to protect your funds and personal information. It allows you to securely store your private keys, ensuring that only you can access your assets.
- Convenience: With the Tron Wallet Extension, you can easily access and manage your TRX and tokens directly from your web browser. This eliminates the need to download and install additional software or rely on third-party platforms.
- Accessibility: The Tron Wallet Extension enables you to connect with decentralized applications (DApps) built on the Tron blockchain. It provides a seamless user experience and allows you to interact with various DApps without leaving your browser.
- Token Support: The Tron Wallet Extension supports a wide range of TRC10 and TRC20 tokens, allowing you to easily send, receive, and store different cryptocurrencies within the same wallet interface.
- Community and Updates: By using the Tron Wallet Extension, you join a vibrant and active community of Tron enthusiasts. The development team regularly releases updates, adding new features and improving the overall user experience.
Overall, the Tron Wallet Extension offers a secure, convenient, and feature-rich solution for managing your TRX and interacting with the Tron ecosystem. Whether you are a beginner or an experienced user, the Tron Wallet Extension is an essential tool for anyone involved in the Tron community.
Setting Up Tron Wallet Extension
If you want to start using the Tron Wallet extension, follow the steps below to set it up:
Step 1: Install the Extension
The first step is to install the Tron Wallet extension on your browser. Open your browser’s extension store (such as the Chrome Web Store for Google Chrome) and search for “Tron Wallet”. Click on the “Add to Chrome” button and wait for the extension to be installed.
Step 2: Create a New Wallet
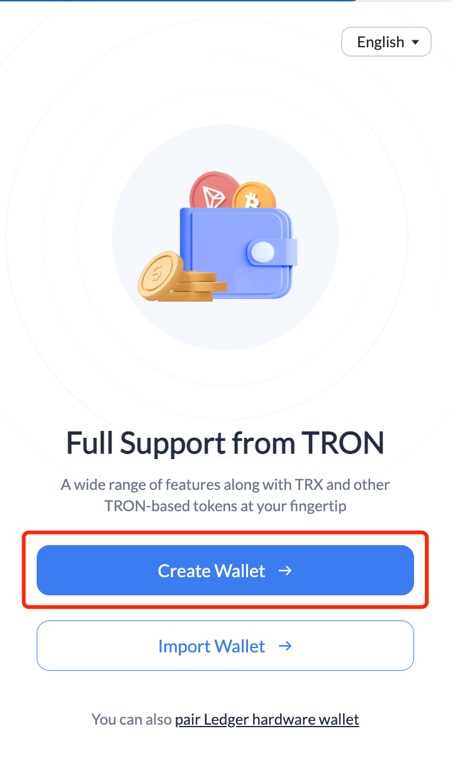
Once the extension is installed, you need to create a new wallet. Click on the Tron Wallet extension icon in your browser’s toolbar, and then click on “Create New Wallet”. Follow the instructions on the screen to set up a password for your wallet and generate a new wallet address.
Step 3: Secure Your Wallet
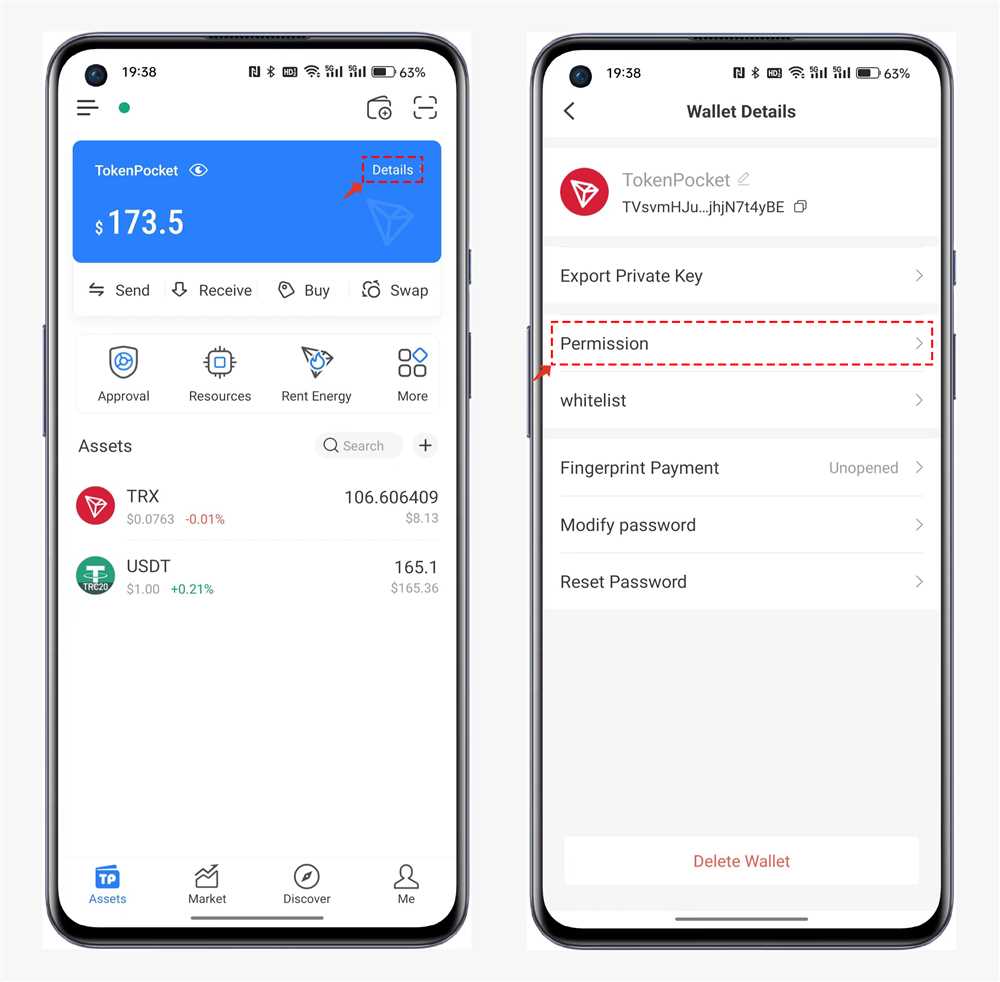
After creating your wallet, it is important to secure it properly. Make sure to write down your wallet’s private key and store it in a safe place. Additionally, consider enabling features like two-factor authentication for an extra layer of security.
Step 4: Import Existing Wallet
If you already have a Tron Wallet and want to use it with the extension, you can import your existing wallet by clicking on the Tron Wallet extension icon, selecting “Import Wallet”, and following the instructions to import your wallet using your private key or keystore file.
Step 5: Explore Features
Once your wallet is set up, you can start exploring the various features offered by Tron Wallet extension. These features may include sending and receiving TRX, participating in Tron decentralized applications (DApps), voting for Super Representatives, and more.
By following these steps, you will be able to set up and start using the Tron Wallet extension to manage your TRX holdings and interact with the Tron blockchain.
Step 1: Downloading the Extension
To set up and use the Tron Wallet extension, you first need to download it to your browser. Follow these steps to download the extension:
- Open your preferred web browser.
- Go to the official Tron Wallet website.
- Click on the “Extension” tab in the navigation menu.
- You will see a list of compatible browsers. Select your browser and click on the corresponding download link.
- A pop-up window will appear asking for your permission to add the extension. Click “Add extension” to proceed.
- Once the extension is added, you will see its icon in the browser toolbar.
Now that you have successfully downloaded the Tron Wallet extension, you can move on to the next step of setting it up and using it for your Tron transactions.
Step 2: Installing the Extension
Once you have chosen a Tron wallet extension, the next step is to install it on your web browser. Here’s how:
- Open your preferred web browser (such as Google Chrome).
- Go to the browser’s extension store or marketplace.
- Search for the Tron wallet extension you have chosen.
- Click on the extension to view more information.
- Click on the “Install” or “Add to Chrome” button (or the equivalent for your browser).
- Wait for the installation to complete.
- You should now see the Tron wallet extension icon in your browser’s toolbar.
Once the extension is installed, you can proceed to the next step: setting up your Tron wallet and creating a new account.
Using Tron Wallet Extension
The Tron Wallet Extension is a convenient tool that allows users to easily access and manage their TRON (TRX) tokens directly in their web browser. Here is a comprehensive guide on how to set up and use the Tron Wallet Extension:
1. Installation
To get started, visit the official Tron Wallet website and click on the “Download” or “Install” button to install the extension on your web browser. The Tron Wallet Extension is currently available for Google Chrome and Mozilla Firefox.
2. Creating a New Wallet
Once the extension is installed, click on the Tron Wallet icon in your browser toolbar to open the wallet interface. To create a new wallet, click on the “Create New Wallet” button and follow the instructions to set up a password and back up your wallet information.
3. Importing an Existing Wallet
If you already have a Tron Wallet, you can import it into the extension by clicking on the “Import Wallet” button. Enter your wallet’s private key or mnemonic phrase and follow the prompts to import it.
4. Managing Your Wallet
Once you have set up or imported your wallet, you can manage your TRON tokens directly from the Tron Wallet Extension interface. You can view your token balance, send and receive TRX, and interact with decentralized applications (DApps) that are compatible with the Tron network.
5. Security Considerations
It is important to take proper security measures when using the Tron Wallet Extension or any other cryptocurrency wallet. Make sure to set a strong password, enable two-factor authentication (if available), and store your wallet backup phrase securely offline. Additionally, be cautious of phishing attempts and only use officially verified wallet extensions.
By following these steps, you can easily set up and use the Tron Wallet Extension to securely manage your TRON tokens in your web browser.
What is Tron Wallet Extensions?
Tron Wallet Extensions is a web extension that allows users to interact with Tron blockchain and manage their TRX and tokens.
How can I set up Tron Wallet Extensions?
To set up Tron Wallet Extensions, you need to install it as a web extension on your browser. It is available for Chrome, Firefox, Brave, and Opera browsers.
Can I use Tron Wallet Extensions on my mobile device?
No, Tron Wallet Extensions is only available as a web extension for desktop browsers.
What can I do with Tron Wallet Extensions?
With Tron Wallet Extensions, you can create or import a wallet, send and receive TRX and tokens, access decentralized applications (dApps), vote for Super Representatives, and participate in various Tron blockchain activities.
Is Tron Wallet Extensions safe to use?
Tron Wallet Extensions has built-in security measures to protect your private keys and ensure the safety of your funds. However, it is always important to keep your browser and operating system up to date and be cautious of potential phishing attempts.