
Metamask is a popular browser extension that allows users to interact with decentralized applications (DApps) and blockchain networks directly from their web browsers.
If you’re new to Metamask and want to start exploring the Tron network, this step-by-step guide will walk you through the process of adding the Tron network to your Metamask wallet.
Step 1: Install Metamask
The first step is to install the Metamask extension in your preferred web browser. Metamask is available for Chrome, Firefox, Brave, and Edge. Simply search for “Metamask” in your browser’s extension store and follow the installation instructions.
Step 2: Create a new wallet or import an existing one
Once Metamask is installed, open the extension and either create a new wallet or import an existing one using your private key or recovery phrase.
Step 3: Access the settings
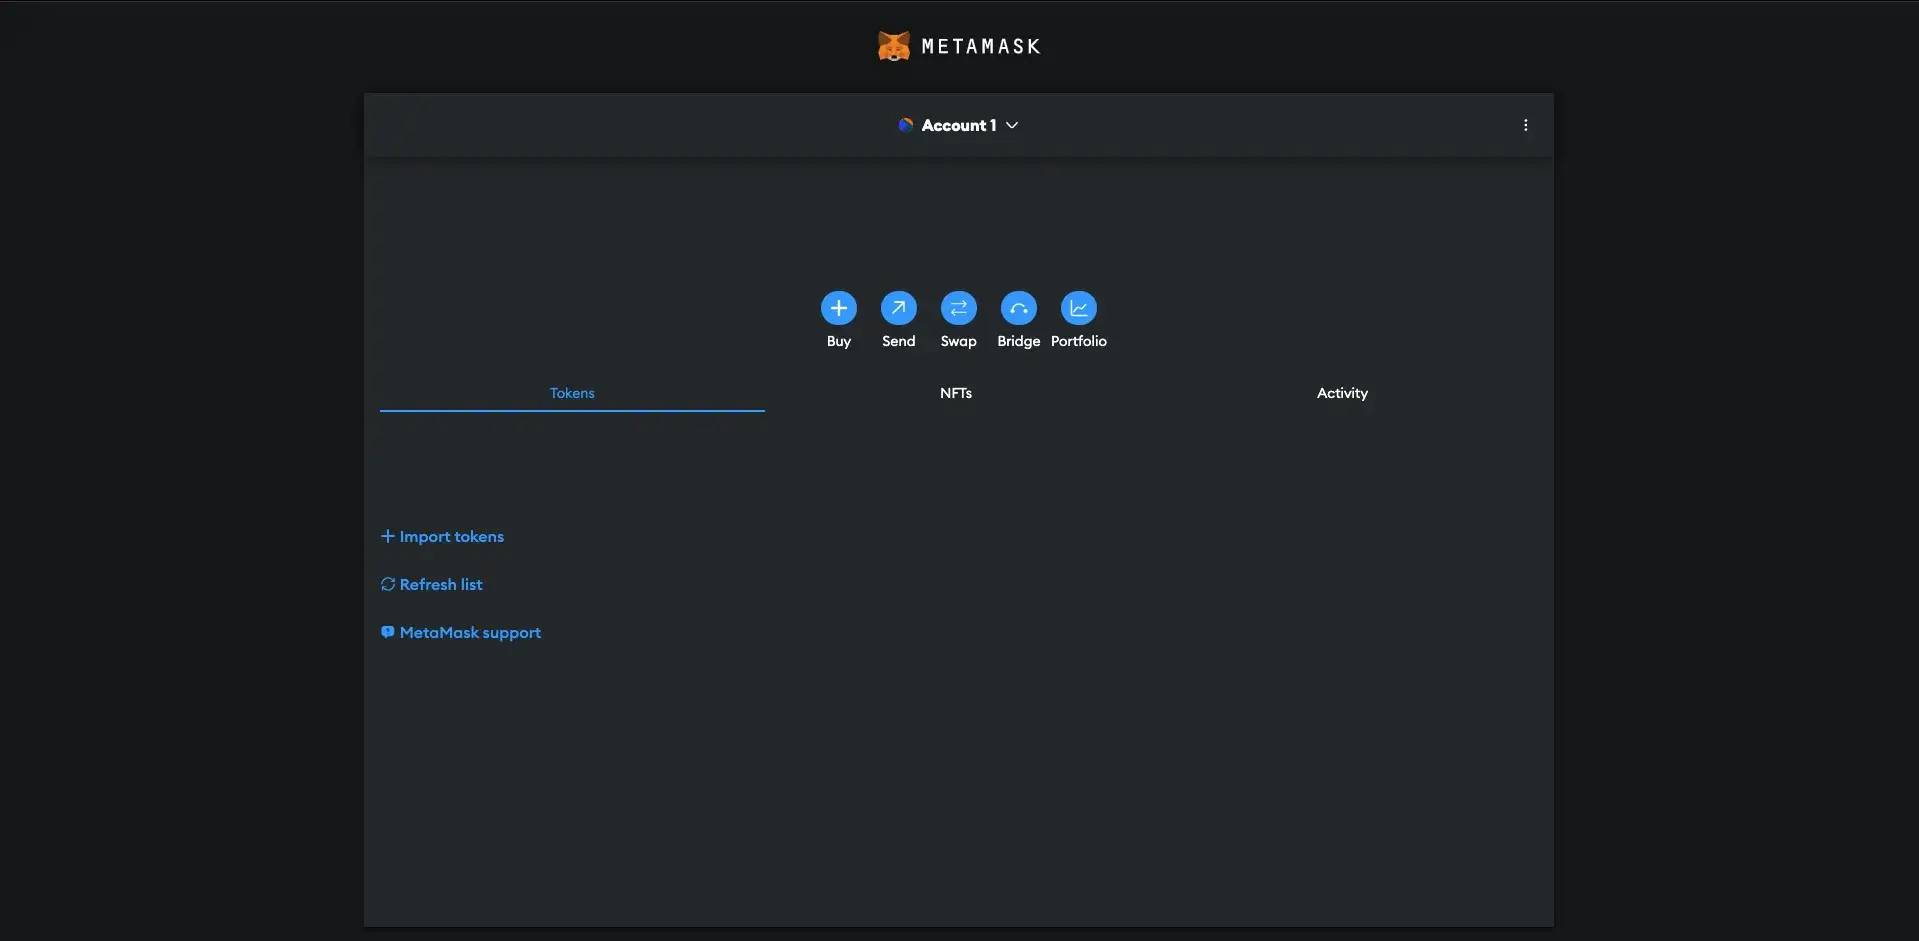
After setting up your wallet, click on the Metamask icon in your browser’s toolbar to open the extension. From the popup window, click on the menu icon (three horizontal lines) and select “Settings”.
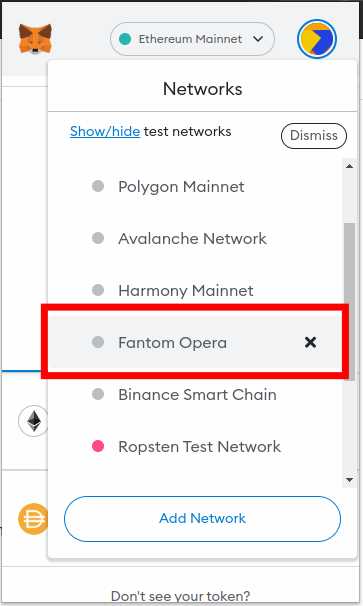
Step 4: Network selection
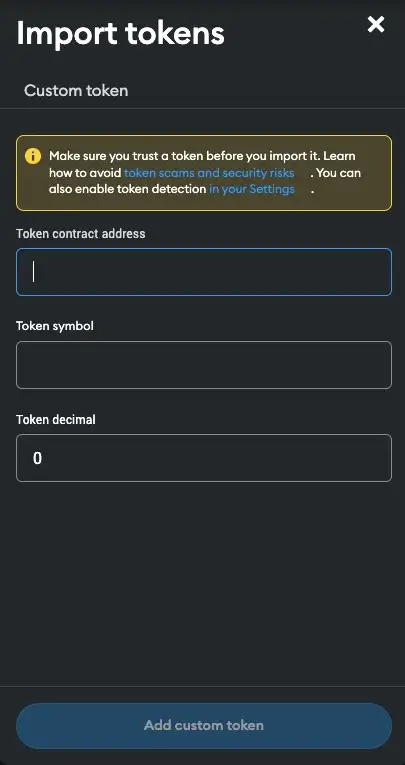
In the Settings menu, select the “Networks” tab. This tab allows you to add and manage different blockchain networks in Metamask. Scroll down to the bottom of the page and click on the “Add Network” button.
Step 5: Fill in Tron network details
In the “Add Network” form, enter the following details to add the Tron network:
Network Name: Tron
New RPC URL: https://api.trongrid.io
Chain ID: 1
Note: The RPC URL may change over time. Make sure to check the official Tron documentation for the latest RPC URL.
Step 6: Save and switch network
After entering the network details, click on the “Save” button. Metamask will now show the Tron network as an option in the networks list. Simply select the Tron network to switch your Metamask wallet to the Tron network.
That’s it! You have successfully added the Tron network to your Metamask wallet. Now you can start exploring and interacting with Tron-based DApps and decentralized finance (DeFi) applications directly from your web browser.
How to Add Tron Network to Metamask
Metamask is a popular browser extension used to interact with decentralized applications (dApps) on various blockchain networks. By default, Metamask supports the Ethereum network, but it is also possible to add other networks, such as Tron, to Metamask.
Adding the Tron network to Metamask allows you to access and interact with Tron-based dApps without needing a separate wallet. Here’s a step-by-step guide on how to add the Tron network to Metamask:
Step 1: Install and Set Up Metamask
If you haven’t already, download and install the Metamask extension for your preferred browser. Once installed, follow the on-screen instructions to set up your Metamask wallet by creating a new account or importing an existing one.
Step 2: Open Metamask and Access Settings
After setting up your wallet, click on the Metamask extension icon in your browser to open the Metamask interface. Next, click on the account icon in the top-right corner, and then click on “Settings” in the dropdown menu.
Step 3: Add Custom RPC Network
In the Metamask settings, click on the “Networks” tab. Scroll down and click on “Add Network” to add a custom network.
| Network Name | New RPC URL | Chain ID | Symbol |
|---|---|---|---|
| Tron | https://rpc.tron.grid.tf/ | 1 | TRX |
Fill in the table with the following details for the Tron network:
Network Name: Tron
New RPC URL: https://rpc.tron.grid.tf/
Chain ID: 1
Symbol: TRX
Once you’ve entered the details, click on “Save” to add the Tron network to Metamask.
That’s it! You’ve successfully added the Tron network to Metamask. You can now select the Tron network from the networks dropdown menu in Metamask and start interacting with Tron-based dApps.
Step 1: Install and Open Metamask Extension
To get started with adding the Tron Network to Metamask, the first step is to install and open the Metamask extension in your browser.
- Go to the Chrome Web Store or Firefox Add-ons and search for “Metamask.”
- Click on the “Add to Chrome” or “Add to Firefox” button to install the extension.
- Once the extension is installed, you should see the Metamask icon appear in your browser’s toolbar.
- Click on the Metamask icon to open the extension.
- If you are using Metamask for the first time, you will need to create a new account by clicking on the “Create a Wallet” button. Follow the instructions to set up your account and create a password.
- After setting up your account, you will be provided with a unique 12-word recovery phrase. Make sure to write down and securely store this recovery phrase, as it can be used to restore your account if you ever lose access to your device.
- Once your account is set up, you can choose whether to import an existing wallet or create a new one. For this guide, we will assume you are creating a new wallet.
- You can now start using Metamask with your newly created wallet. Make sure to switch to the Main Ethereum Network by clicking on the network dropdown menu and selecting “Main Ethereum Network.”
Congratulations! You have successfully installed and opened the Metamask extension. Now, you are ready to proceed to the next step of adding the Tron Network to Metamask.
Step 2: Access the Metamask Settings
To begin adding the Tron network to Metamask, you’ll need to access the settings within the Metamask extension. Follow the steps below to access the settings:
- Open your browser and navigate to the extension toolbar located at the top right corner of your browser window.
- Click on the Metamask icon, which resembles a colorful fox face.
- A small drop-down menu will appear. From this menu, click on the “Settings” option.
- This will open the Metamask settings page, where you can configure various options and network settings.
Once you have successfully accessed the Metamask settings, you’ll be ready to move on to the next step and add the Tron network to your wallet. Make sure to follow the instructions carefully to ensure a smooth configuration process.
Step 3: Add the Tron Network
Now that you have Metamask installed and set up, it’s time to add the Tron network to your wallet. Follow the steps below:
Step 3.1: Open Metamask
Click on the Metamask icon in your browser toolbar. This will open the Metamask wallet interface.
Step 3.2: Access the Settings
Once Metamask is open, click on the account avatar in the top right corner of the wallet interface. This will open a dropdown menu. From the menu, select “Settings”.
Step 3.3: Select Networks
In the settings menu, you will see a list of options on the left side. Click on “Networks” to access the network settings.
Step 3.4: Add the Tron Network
In the network settings, click on the “Add Network” button. This will open a form where you can enter the details of the Tron network.
| Network Name | Tron |
|---|---|
| New RPC URL | https://api.trongrid.io |
| Chain ID | 1 |
| Symbol | TRX |
| Block Explorer URL | https://tronscan.org |
Once you have entered the details, click on the “Save” button to add the Tron network to your wallet.
Congratulations! You have successfully added the Tron network to Metamask. You can now use your wallet to interact with the Tron blockchain and Tron-based applications.
Step 4: Connect to the Tron Network
Once you have added the Tron network as a custom network in your Metamask wallet, the next step is to connect to the Tron network.
Step 4.1: Open Metamask
Open the Metamask extension or app on your browser or mobile device. Make sure you are logged in to your wallet.
Step 4.2: Select Tron Network
In the Metamask interface, locate the network selection dropdown. This is usually indicated by a small network logo or the word “Mainnet” if you are currently connected to the Ethereum network. Click on the dropdown to see the available networks.
Scroll down the list of networks and select the Tron network you added in Step 3. You should see the network listed with the name and symbol you provided, as well as the RPC URL and chain ID.
Step 4.3: Confirm Network Connection
After selecting the Tron network, Metamask will prompt you to confirm the network connection. This is a security measure to ensure that you are connecting to the correct network. Review the details of the network connection and click “Switch Network” or “Confirm” to connect to the Tron network.
Once the network connection is confirmed, Metamask will reload and you will be connected to the Tron network. You should see the Tron logo or network name at the top of the Metamask interface to indicate that you are connected to the correct network.
Congratulations! You have successfully connected to the Tron network using Metamask. Now you can start interacting with Tron dapps and managing your TRX tokens directly from your Metamask wallet.
What is Metamask?
Metamask is a browser extension wallet that allows users to interact with decentralized applications (dApps) on the Ethereum blockchain and other compatible blockchains.
What is the Tron network?
The Tron network is a blockchain platform that aims to create a decentralized internet by providing a high-throughput, scalable, and reliable infrastructure for running decentralized applications (dApps). It uses its native cryptocurrency called Tronix (TRX).
Can I use Metamask with Tron dApps?
Yes, you can use Metamask with Tron dApps by adding the Tron network to your Metamask. Once you have added the Tron network, you will be able to interact with Tron dApps just like you would with Ethereum dApps.
Are there any risks in adding the Tron network to Metamask?
Adding the Tron network to Metamask does not pose any significant risks as long as you use trusted sources for obtaining the necessary information, such as the official Tron website or reputable community forums. However, it’s always important to exercise caution and verify the information before making any changes to your wallet settings.